There’s no need to spend money on a dog gate when you can make one yourself using cardboard. This is a simple and easy project that anyone can do, and it only takes a few minutes. Plus, you can customize your gate to fit the size of your opening. This article will discuss how to make a dog gate out of cardboard.
Anyone with a dog knows that they can be a bit of a nuisance when it comes to staying off the furniture. So a simple solution is to create a dog gate out of cardboard. Not only is this an easy project, but it’s also affordable.
Contents
Things You’ll Need
Cardboard Dog Gates Are Elementary to Make, but You Will Need the Following Materials Beforehand :
- A measuring tape
- Pencils
- Scissors
- Adhesive (such as hot glue or duct tape)
A Stepwise Guide on How to Make a Dog Gate Out of Cardboard
Step 1 : Determine the Location of the New Dog Gate
You need to make a doggie gate out of cardboard. First, you have to decide where to put it. Make sure it’s in a place where the dog can’t get into any other rooms in your house, except for its own space.

This way, it will give a sense of isolation to your pup and help calm him down. If you have little ones running around at home, then place the gate near their rooms because dogs tend to respond well to children’s cries and screams.
When choosing a space for your new puppy gate, avoid placing them near high-traffic areas as this will only distract both humans and canines from their immediate tasks – which is nothing more than being idle.
Step 2 : Measure
Measurement is critical when it comes to how to make a dog gate out of cardboard. First, measure your pet from his nose up to his tail while he’s standing in an upright position.
Then, add at least 6 inches of space on top of that number so that your dog has some room to move around with ease. Also, remember that dogs tend to stretch when they lie down, so it’s best to have a little more space in between the bars of your new dog gate.

Step 3 : Draw the Sizing Slits on the Cardboard
Once you’re done measuring, it’s now time to draw the sizing slits. Use your pen and marker (or pencil) to draw out 4 bars that extend from left to right, with each bar at least 6 inches apart until you reach the end of where you intend for the cardboard dog gate barrier to be placed.
Ensure that your new dog gate is structurally sound enough not to collapse or come loose by making sure all measurements are accurate. For example, if you measure 20 inches for your pup’s length plus an additional 6 inches on top of that number, make each bar at least 4 feet apart (20 + 16 = 36; divide both numbers by 2).
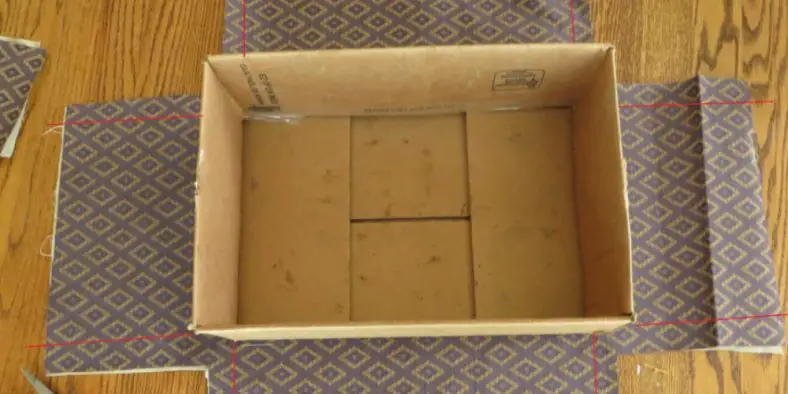
Step 4 : Cut
Once you’re drawn out the bars, it’s now time to cut them out. Save yourself some trouble and prick each end of your new dog gate with a pin first before cutting, allowing the sharp parts to poke through the cardboard for easier cutting.
Secure your newly made dog barrier by taping down each corner with adhesive or duct tape. This will ensure that it remains intact after several uses. Finally, cut one more bar on top of each original bar, making sure to leave at least 2 inches of space. This will allow small dogs to pass through the front portion comfortably.
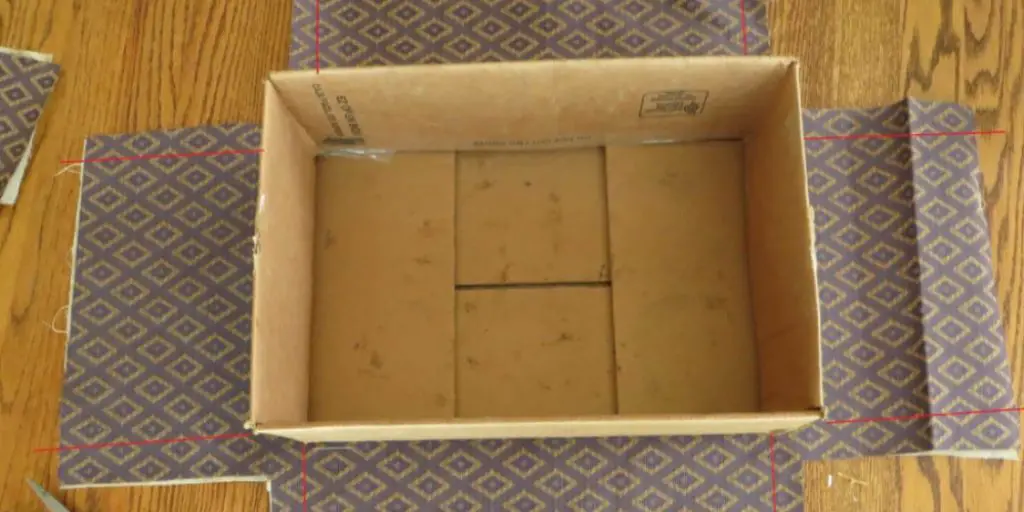
Step 5 : Mount the Cardboard Dog Gate
Once all pieces are cut, secure them together using adhesive or duct tape on each corner. Then, you can either place your new dog gate in front of your couch so that your pup will have to hop over it, or you can let it stand directly on the ground with its bottom holes securely taped down.
How you choose to do this is up to you because both methods are equally effective in keeping dogs out of specific house areas while also granting them access at certain times.
Step 6 : Test It Out
After mounting the cardboard dog gate barrier in an area where it’s hard for little kids or pets to reach, make sure that no obstacles are blocking the way before letting your dog try it out. Let your furry friend explore the new dog gate at its own pace, allowing him to move around or walk through until he finds his way everywhere. A bit of patience and some food treats can help your dog get used to the new pet gate in no time.
How long it takes for your little buddy to get used to the new pet barrier will depend on how intelligent and sensitive he is towards unfamiliar surroundings. Do not be discouraged if it takes several tries before he finally gets the hang of things because every pup learns at his rate – especially these canines who are high-maintenance when it comes to training!
With a sturdy cardboard dog gate to put up as a barrier, not only will you be able to keep your pets away from young children and other dogs, but you can also save yourself from worries of broken furniture or destroyed home appliances because of constant paw prints.
If you want to keep your dog from damaging your property, the best way is to keep them out of harm’s way. These steps will help you make a dog gate out of cardboard.
You can check it to Long Can a Small Dog Hold Its Bladder Overnight?
Tips and Warnings
Tips
- Use heavy-duty cardboard for the best result.

- Be sure to buy an Exacto knife when making a dog gate out of cardboard, as it is much easier than finding a box cutter.
- Measure your dog before cutting your pieces of cardboard, so you know how big to make them.
- Make the sizing slits about 6 inches apart so that you can fit your dog through one at a time (if they are able).
- If you are using paint, be sure to prime the surface first so that any wetness does not cause warping or bleeding through the color coat.
- Use a staple gun to secure the cardboard pieces together.
- If you are concerned about your dog chewing or scratching at the gate, use aluminum foil and Gorilla Tape to protect the surface from damage.
Warnings
- Remember to leave enough room for smaller dogs who may use this pet barrier. 2 extra inches should be enough.
- Be careful when using the exacto knife to avoid accidents.
- Remember that some paint may end up on your floors or walls (even with proper precautions) if you are painting, so it is best to be aware of this before starting.
- Remember that dogs are big chewers, so if you use cardboard for this project, it will not stand up to the test of time.
Does It Work?
Yes, it works. Making a gate out of cardboard is easy and cheap! You can build your own dog/baby gate in minutes by following these simple 6-steps. The gates work because they are essentially freestanding fences held together with tension.
They’re very effective pet barriers because they’re freestanding, so you can move them around or take them down when needed without any damage.
Also, making a baby gate out of cardboard will keep your curious toddler safely confined while keeping costs low on your project. Cardboard is a DIYer’s go-to material for quick and easy projects. And, because it’s so inexpensive and lightweight, you can move them around as you need to.
What Can You Use Instead of a Dog Gate?
If you have a dog and want to confine him within a particular area of your home, you may be considering purchasing a pet gate. However, if you don’t want to spend the money on an actual entrance or don’t like how it looks in your house, there are other options besides buying one from the store.
This option is perfect for those who need a little help keeping their pup away from certain areas but don’t want to make a significant investment or buy something that doesn’t suit their taste.
There are several ways you can “make your own” gate without spending too much money or time constructing one. Making a dog gate out of cardboard is the most straightforward approach and will cost about $15-25, depending on how large you want it to be. However, cardboard is affordable, easy to work with, holds up well against dogs (if properly attached), and looks lovely in most homes. This type of gate works great for small dogs at doorways or hallways – but should never be used at the top of stairs since it isn’t safe for them.
Conclusion
I hope you have learned how to make a dog gate out of cardboard. The dog gate at the bottom of our stairs has been a lifesaver. It’s so easy to put up and take down, it folds flat for storage, and we can carry it with us when we travel! Plus, if you have an extra guest coming over or need to divide your space temporarily (i.e., while painting), this is perfect!
You may read it also – How to Keep Dog in Wrought Iron Fence